Hello Jersey Girl, Texan Heart Fam! So happy that Monica is letting me take over her blog today, thanks for having me! I thought since I love hair, and spent all of last year learning how to do my hair, that I would do a blog take over and show you a hair tutorial.
This tutorial is combining my how to french braid your own hair and how to do a top knot styles into one style. It’s a simple way to make your hair look WAY more fancy than the effort you put into it. Let’s get to it.
Step 1:
Put your fingers 2/3rds down your eyebrows and follow that line up to your hair, section hair off on either side. You can tie the sides with some pony tail holders to keep hair from getting swept up into your braid.
Step 2:
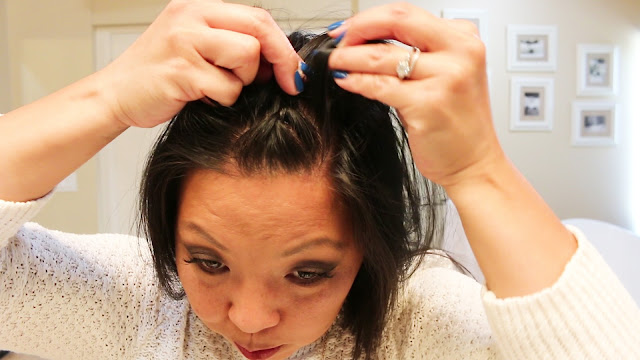
Start a mini French braid. Normally when you do a French braid you add in larger chunks of hair, but for this you are going to want to add in the smallest chunks of hair possible.
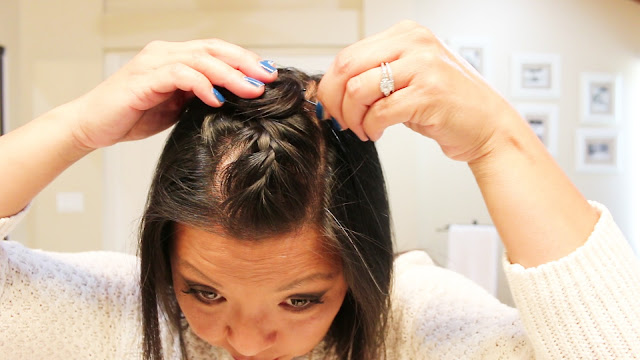
Continue to French braid your hair until you reach the point where you want your top knot to start, I will typically stop just before I reach the crown of my head. Continue to braid regularly for a few stitches.

Step 4:
Start to twist the hair around, if you have longer hair, you will want to twist hair, start to wrap it in a bun, and then twist wrap some more in a bun, etc. If you have shorter hair, you can probably twist it all, and then wrap into a bun.
Step 5:
Secure with my favorite bobby pins
(affiliate link). Trust me you are going to want some good bobby pins.
One thing I learned from my year long hair challenge, is having the non
drug store bobby pins is a must. The difference in quality and the
ability to keep hair in place is huge!
Step 6:
Once secured with bobby pins, start to pull the bun apart till desired look is achieved.
Here is your finished bun.
Tip: You might have to repeat step 5 and 6, a few times before you get your
hair how you want it. Trust me sometimes I’ll try this style and it’s
just not working for me, so I ditch it all together and do something
else. We all have those days. Don’t get frustrated just try again another day.
Bonus hair style coming at you:
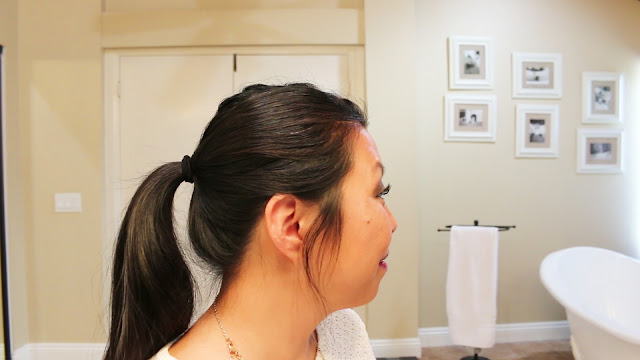
I had worn this style to work, and after getting home I wanted to transition it for the gym. I took out the small bun, kept the french braid, and threw it in a pony tail. I am a person that likes to put her pony tail in the middle of her head, so I did a few more stitching in my French braid, and threw it in a pony tail.
Tip: If you are relatively new to the hair game and juggling that many pieces has your palms sweating, you can rubber band the braid, put your hair in the pony, add the braid in and rubber band the whole thing. Then take out the braid rubber band after the pony is where you want it.
Easy way to get your hair up, on those days when you have gone several days between washings and need to stretch it for one more day. You know what I’m talking about. If you want to see a full video of both of the styles, head on over to my blog, Foxy’s Domestic Side.
Thanks for having me Monica! Now get to braiding, if you’re new at doing your hair, just keep at it, practice makes perfect. Trust me there were days when I would spend 45 minutes trying to get something done right to not have it work out, but I kept trying and eventually I got it, might have been several days later, but eventually it worked out, minus the messy bun, I still have no idea how to do that!
Hope you are having a fabulous time on your trip Monica, can’t wait to see the pictures!


